Request time off
Submit an absence request and track it until your approver decides.
Before you start
- You need an active employee profile. Your available balance is shown on your dashboard under Your balance.
Steps
- On your dashboard, click Request time off.
- Pick the absence type (for example Vacation). The picker shows the types your company configured.
- Choose the start and end dates — type them or click days in the small calendar. Days shaded grey are non-working days or public holidays in your branch and are never deducted.
- For a partial day, tick First day: afternoon only (PM) or Last day: morning only (AM). On a single-day request the two options are one half-day choice — you can’t combine them.
- The panel below the dates shows live how many working days will be deducted, and how many public holidays and non-working days in the range are excluded. On a phone the form fills the whole screen and this panel stays visible at the bottom while you change the dates.
- Under Approval you see who will review the request. If your approver is away, the sheet already names the substitute the request will go to.
- If the type asks for a Coverage person, pick the colleague who covers your duties while you’re away. When the field is marked Coverage person (optional) you can leave it empty; otherwise the request can’t be submitted without one. The coverage person is informed — they never approve the request.
- Optionally add a comment, then click Submit request.
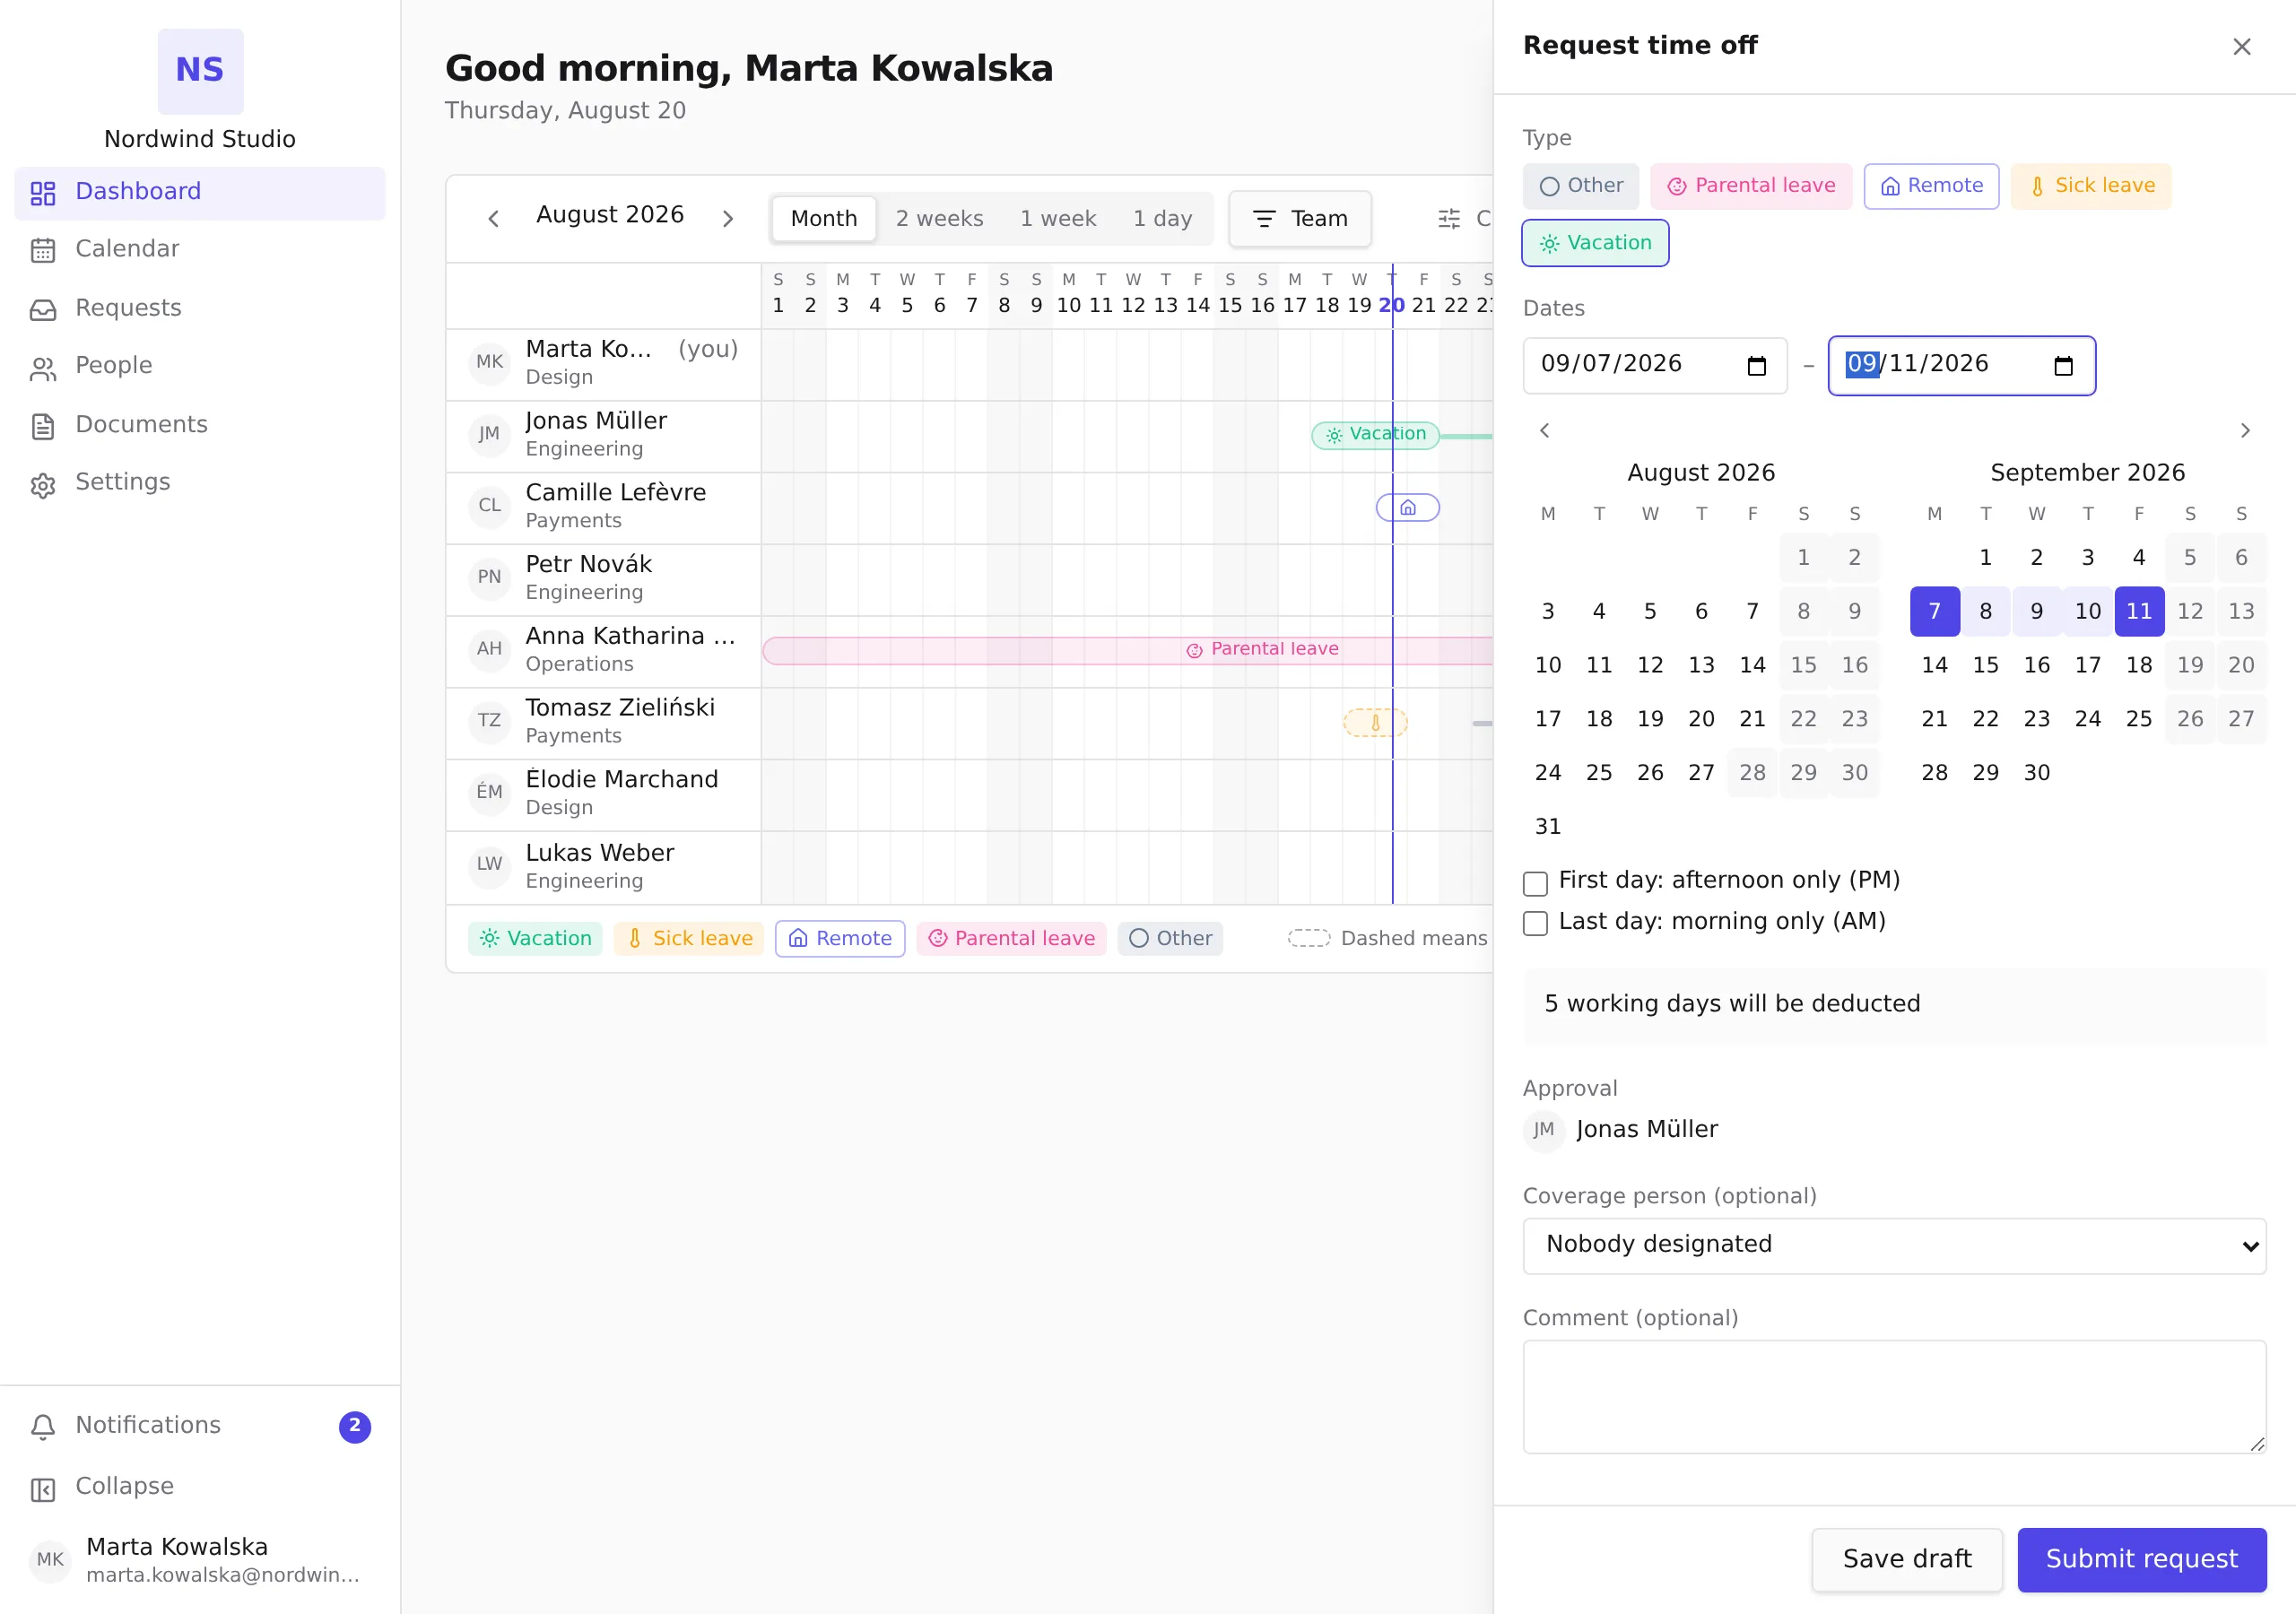
Not ready to send it? Click Save draft instead — see Save it as a draft below.
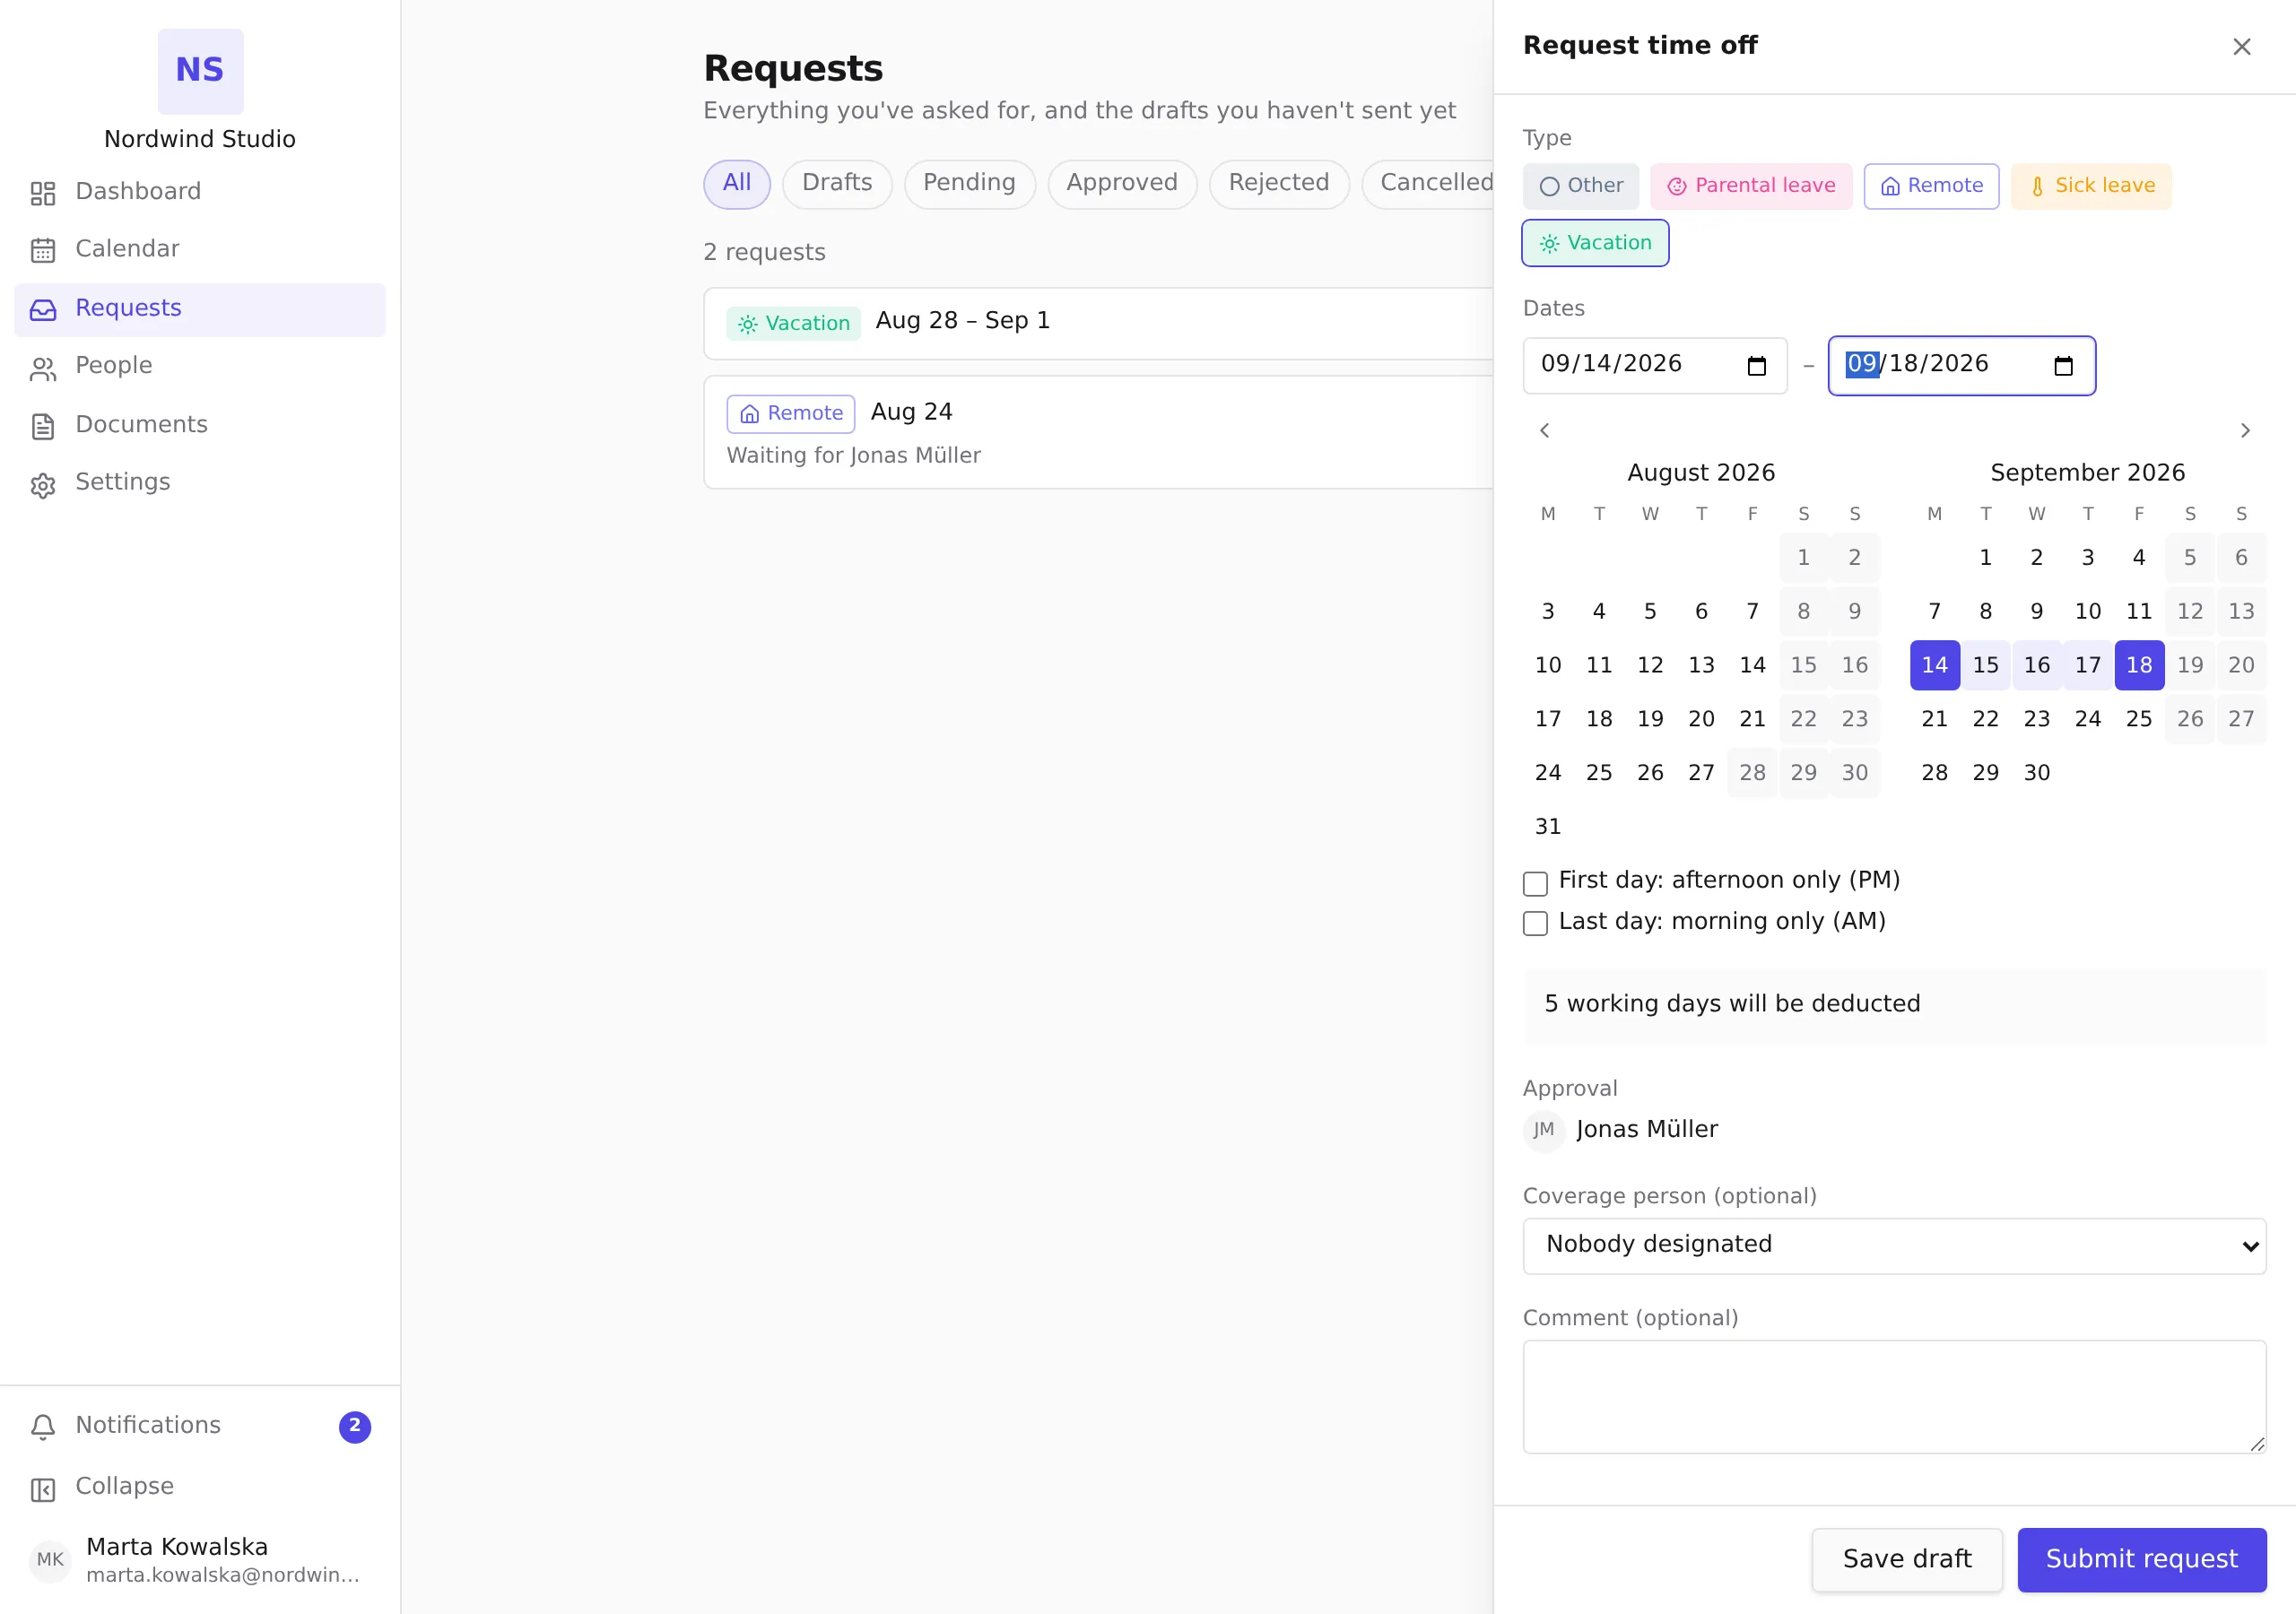
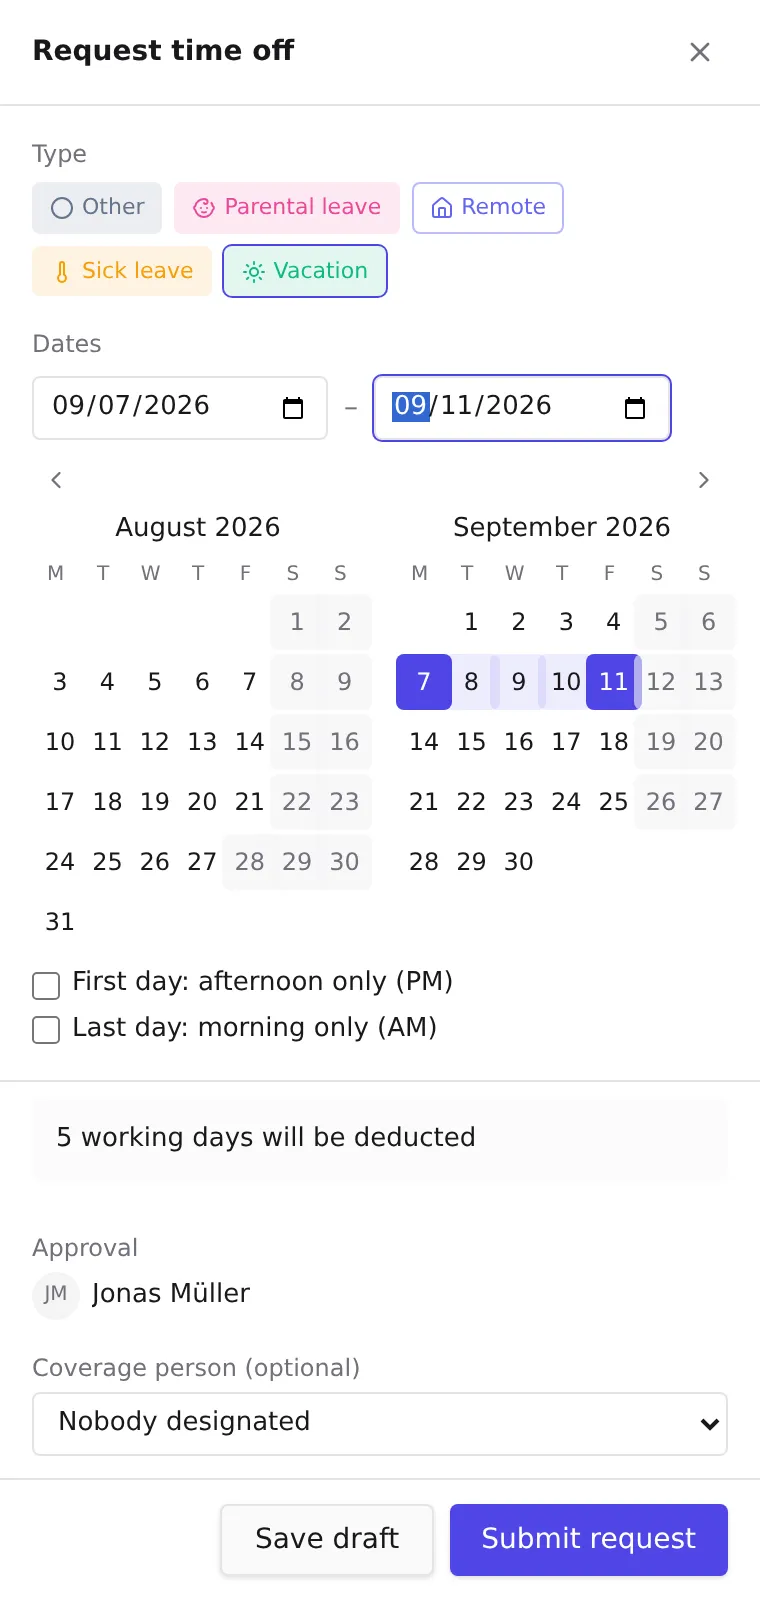
On a phone the same form fills the whole screen:
What happens next
- The sheet confirms with Request submitted and shows the summary: dates, deducted days, your coverage person, and who the request is waiting for.
- Amber notices on the confirmation are warnings, not errors — for example when the request exceeds your remaining balance. The request was still submitted; your approver decides. A red message instead means the request was not created — for example when a company limit for that type blocks it.
- Some types (for example Remote) are approved automatically — the confirmation then reads Approved automatically — you’re all set.
- Working days are counted using your branch’s calendar — public holidays and non-working days are not deducted from your balance.
- Once approved, the days are deducted and the request shows as Approved. If it is declined, nothing is deducted.
- You can withdraw a pending request, or cancel an approved one — cancelled days return to your balance.
Save it as a draft
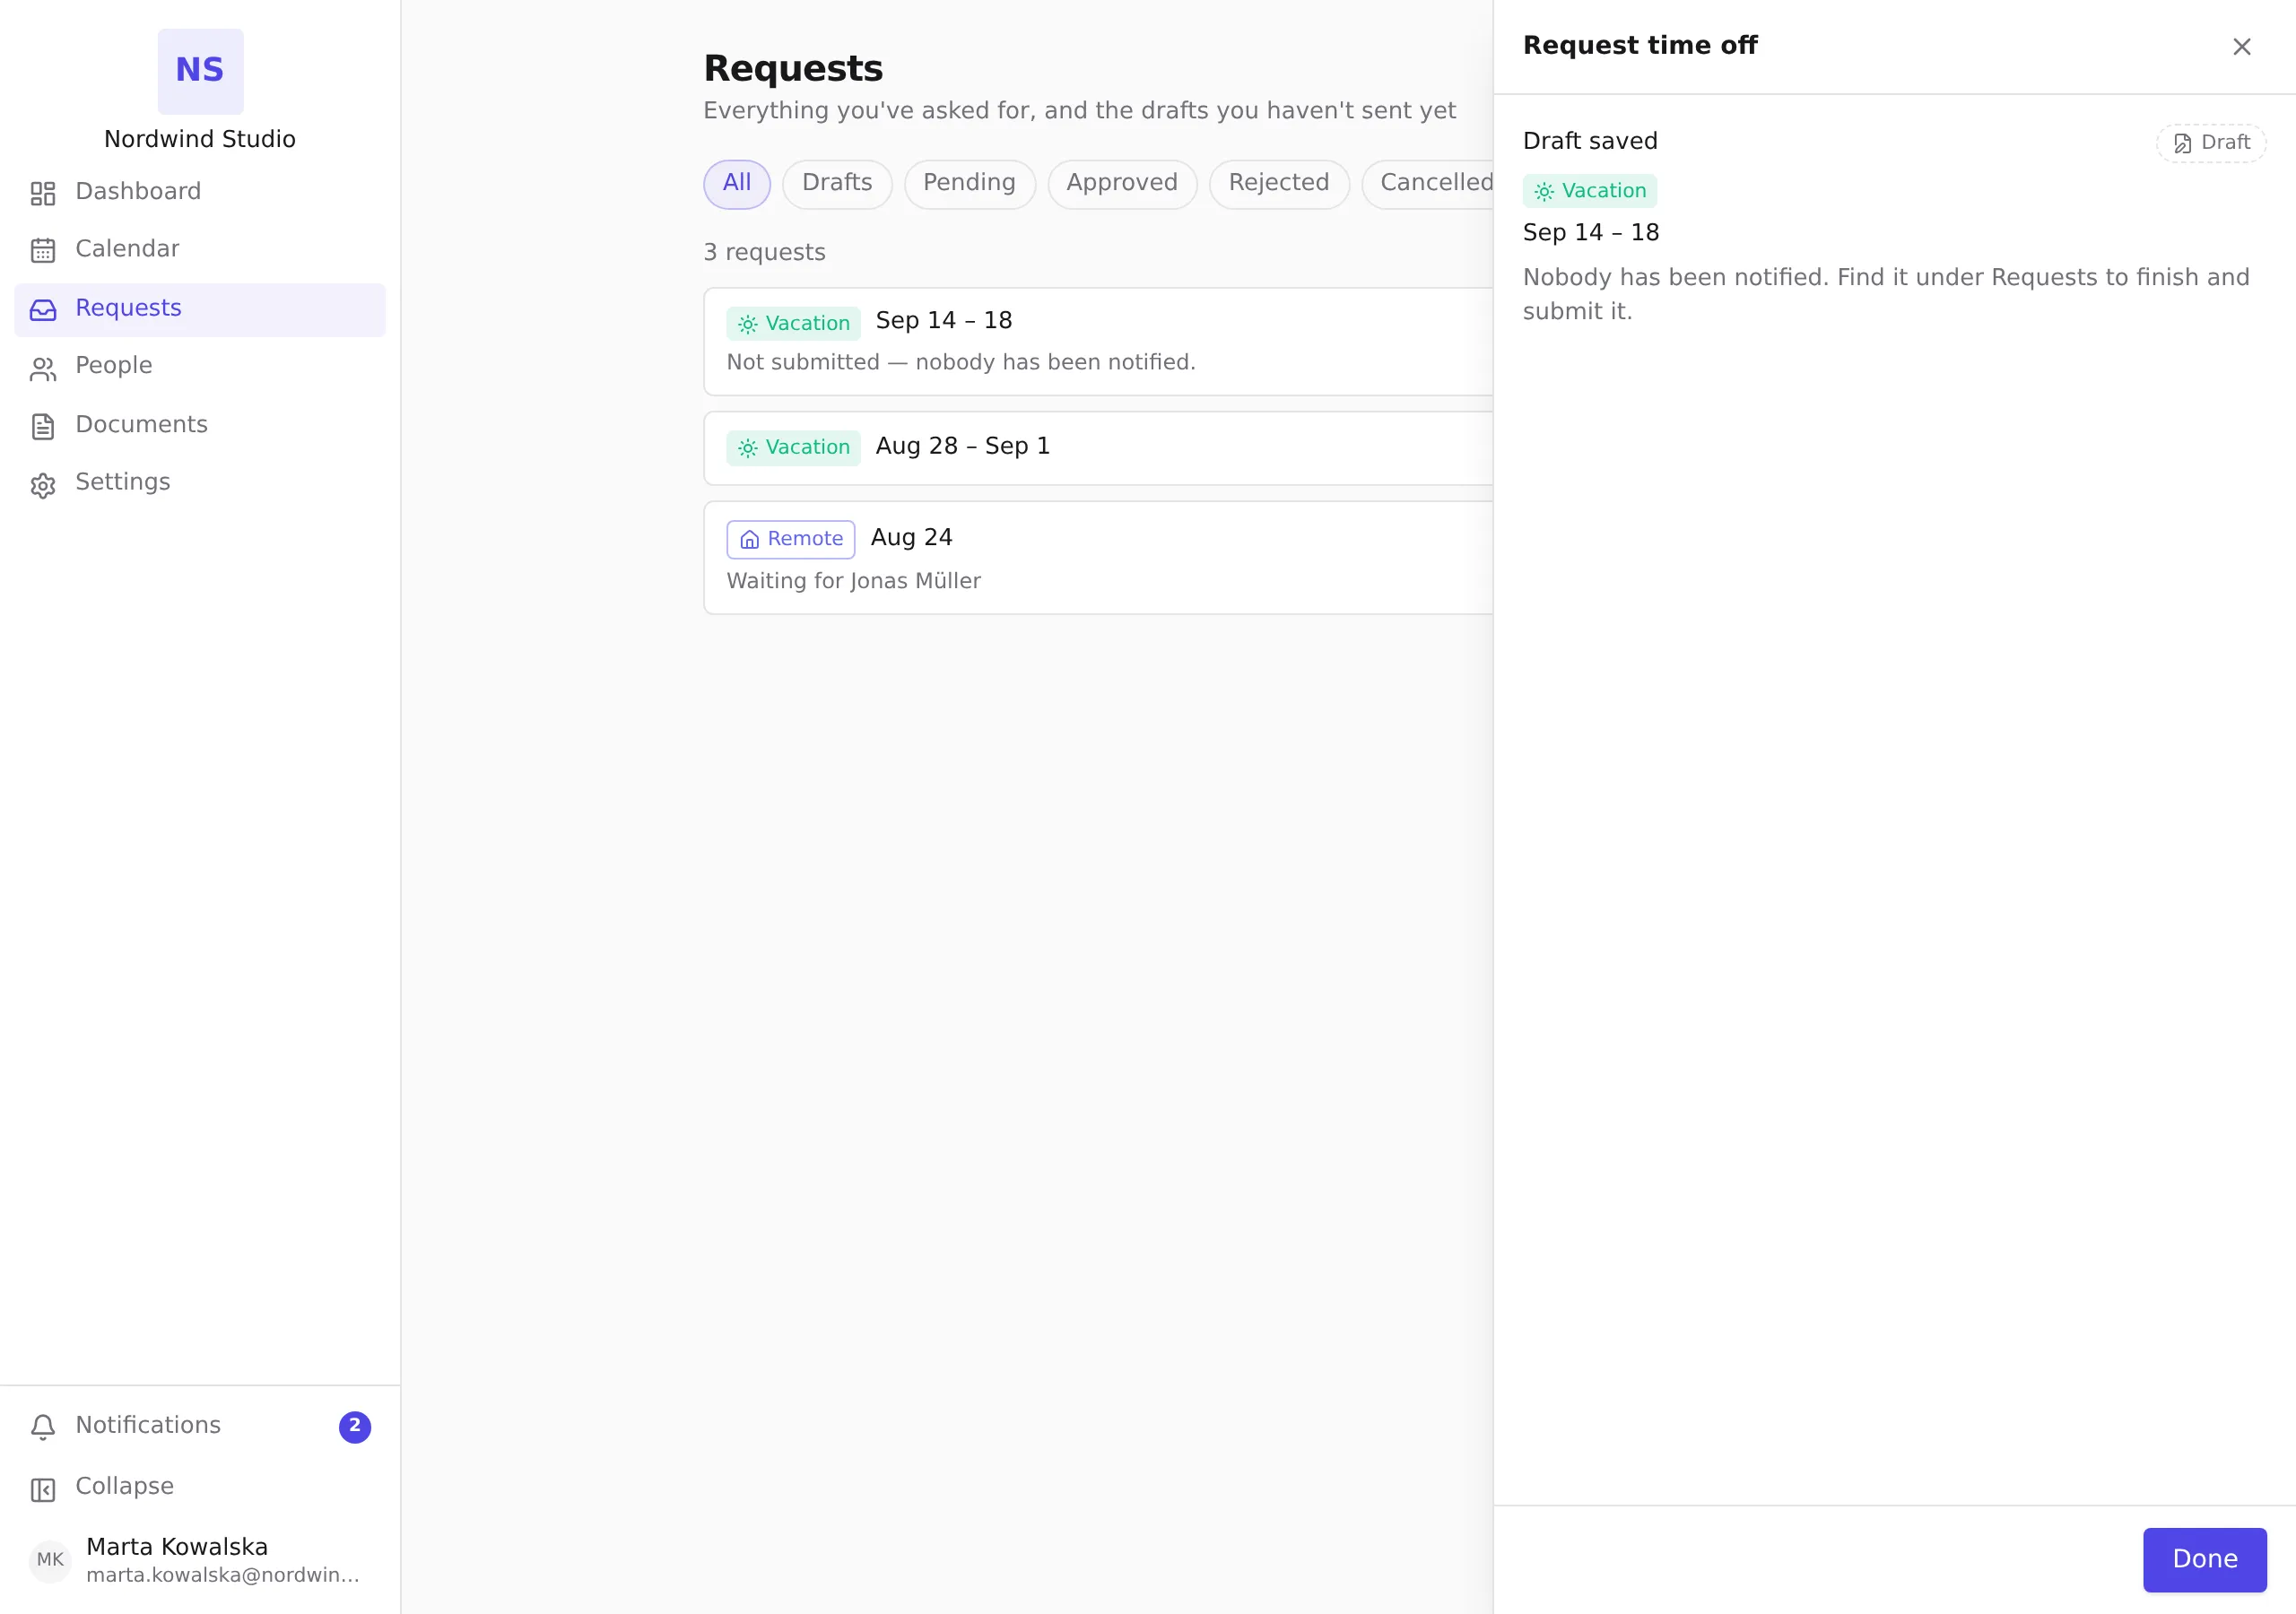
You don’t have to finish a request in one sitting. Click Save draft at any point once you have picked the dates, and the request is kept exactly as you left it.
- Nobody is notified. A draft is not a request: it reaches no approver, appears in no approval queue, and deducts nothing from your balance. The confirmation says so, and so does the row in your list.
- A draft can be incomplete. If the absence type asks for a coverage person you can save without one — you will only be asked for it when you submit.
- The confirmation reads Draft saved. Find it again under Requests, where it is marked Draft; open it to finish, submit or discard it. See Find and manage your requests.
Types that are recorded, not requested
Some absence types (typically Sick leave) don’t go through approval — they are recorded when they happen. When you pick such a type the sheet explains this and shows no submit button: your manager or HR records the absence for you. Managers and HR see a Record for picker and a Record absence button in the same sheet — see Record sick leave for an employee.