Organising and uploading HR documents
Dieser Inhalt ist noch nicht in deiner Sprache verfügbar.
Build the folder tree your HR documents live in, and publish files to them.
Before you start
- You need a role that manages documents (HR or Admin).
- Your organization needs the HR documents module. It is not on by default — if the screen says “This feature is not enabled for your organization.”, that is a subscription question, not a permissions one, and nothing you can change from here.
- Open Documents from the main navigation. On a phone it is in the More drawer.
- The screen has two tabs. Library is the one described here; Sent to me is your own documents, which everyone has — see Reading and accepting a document sent to you.
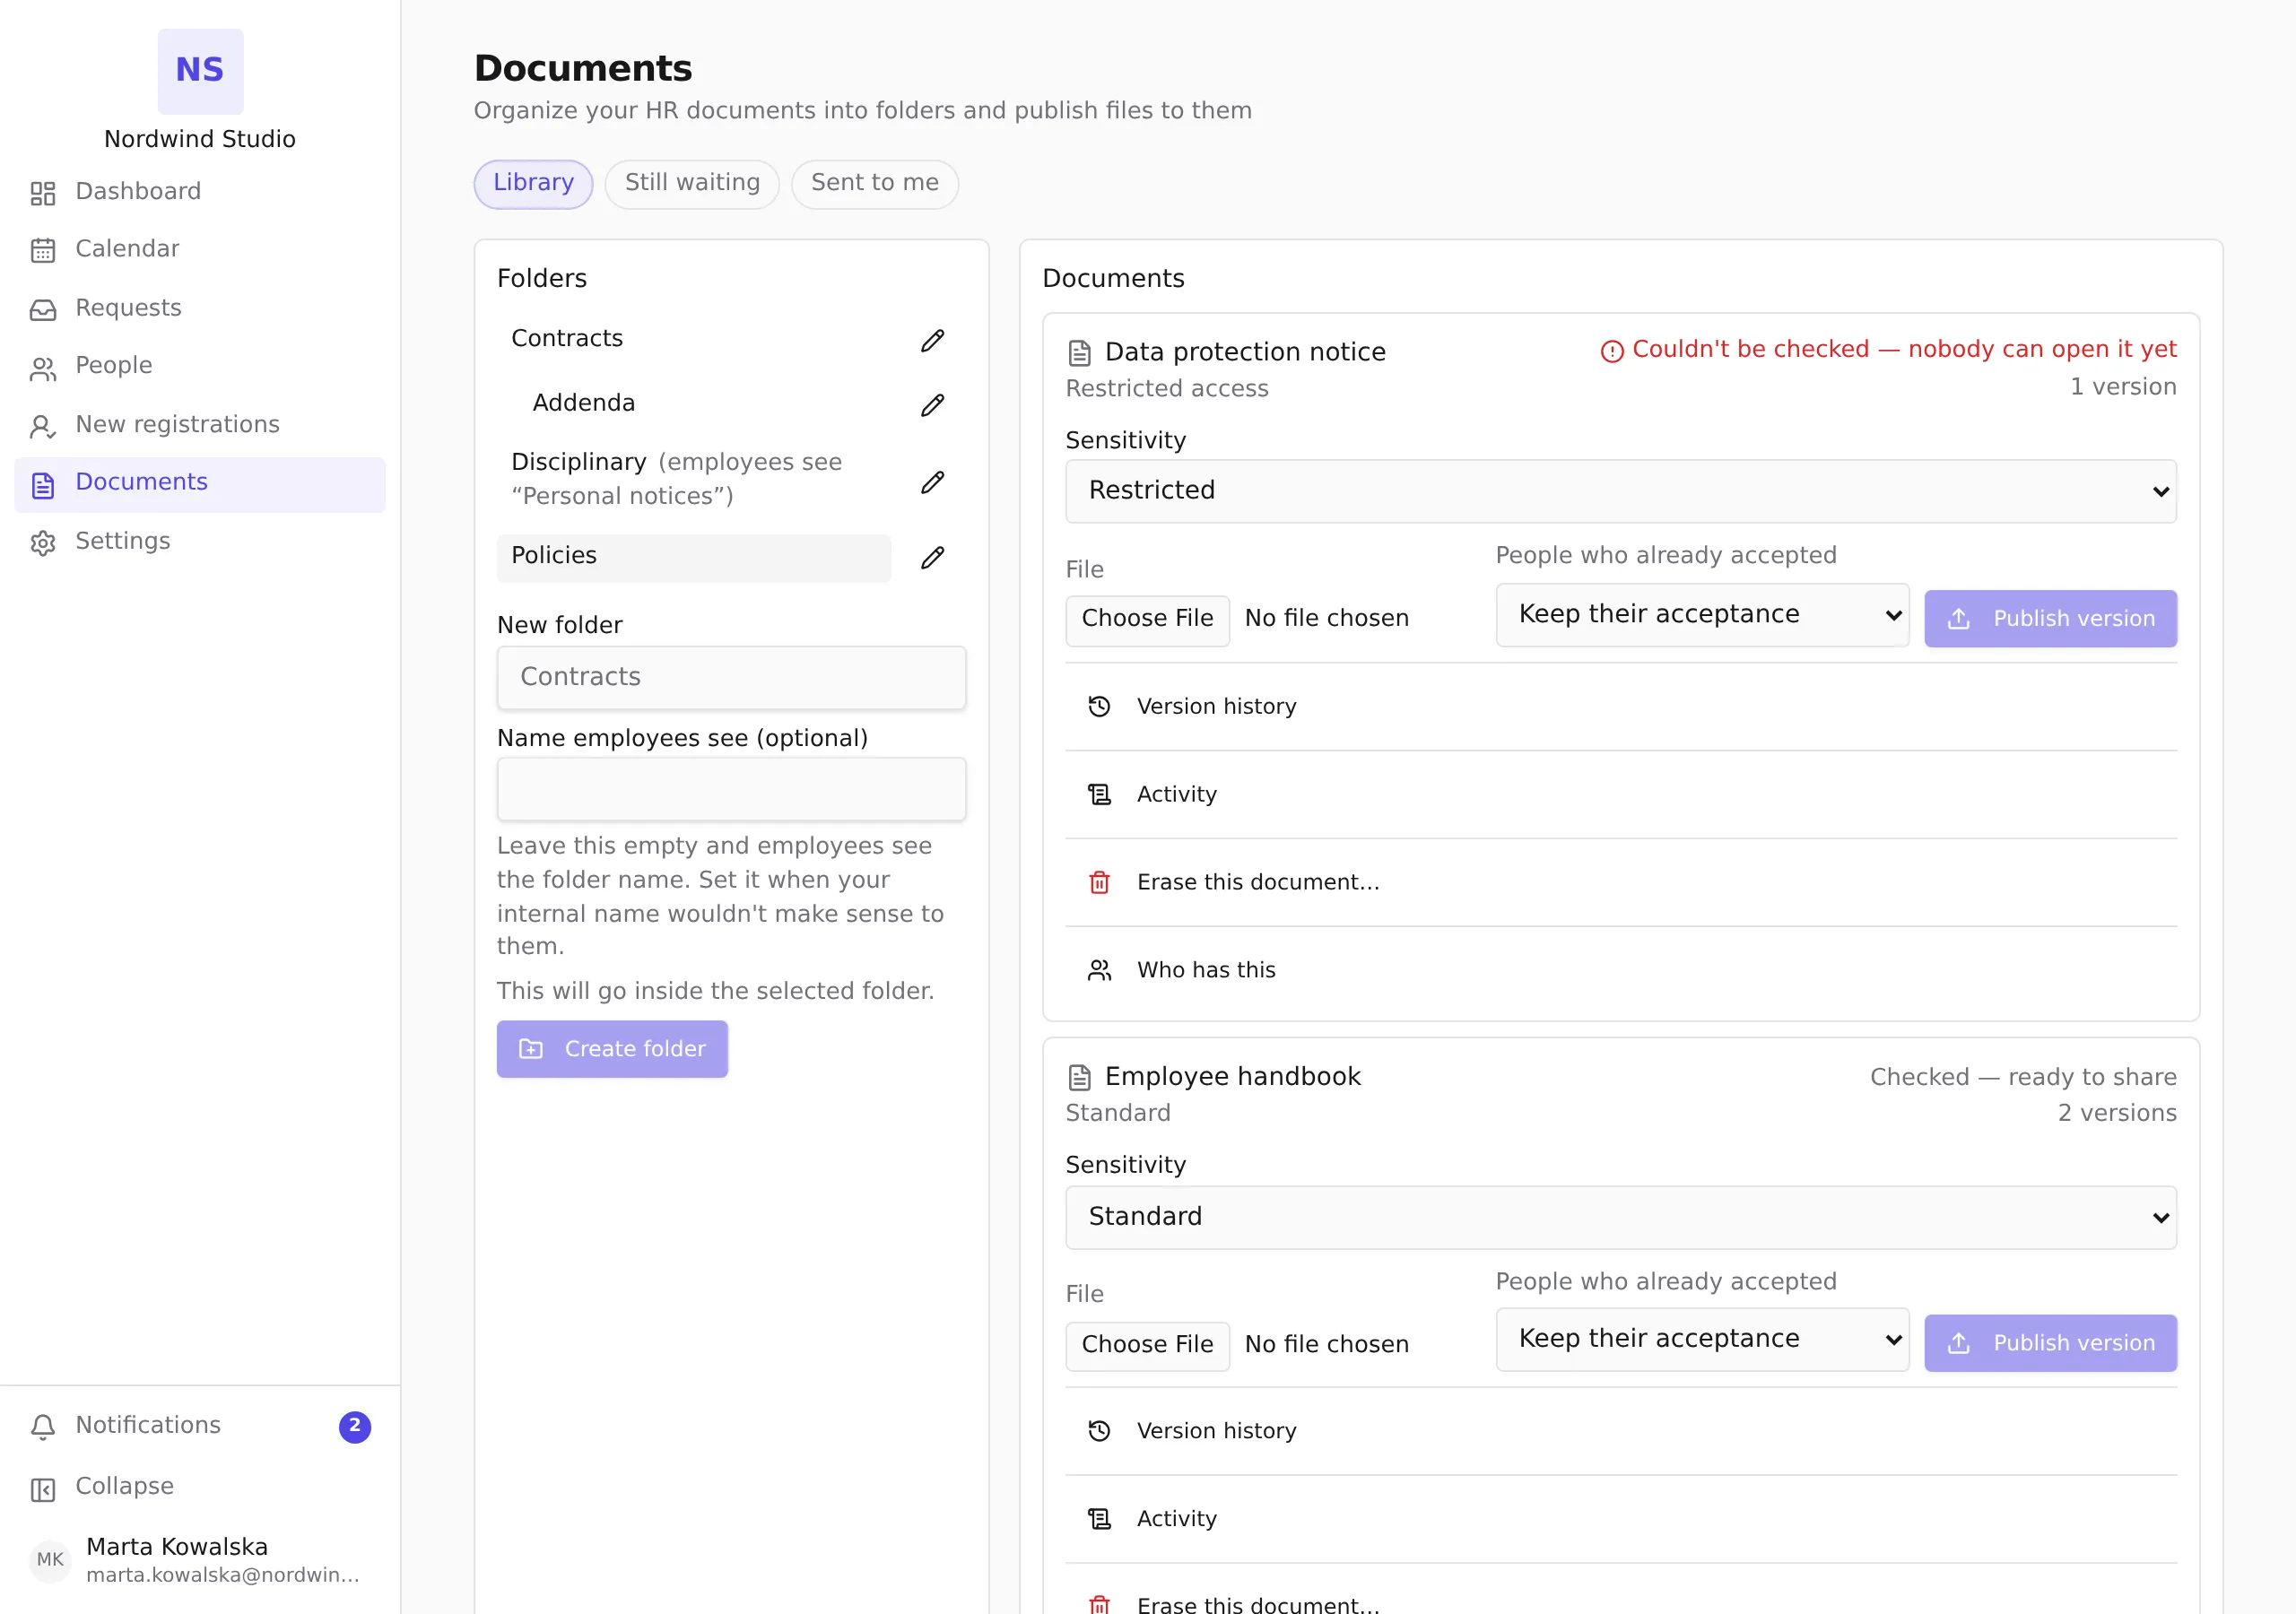
Create a folder
- Under New folder, type the name you want to work with — for
example
Contracts. - Leave Name employees see (optional) empty for now.
- Press Create folder.
The line under the form tells you where the folder will go before you press: This will be a top-level folder when nothing is selected, or This will go inside the selected folder when a folder is. To nest a folder, select its parent first.
Give a folder a different name for employees
Every folder has two names, and this is the reason:
- Folder name is what you and your colleagues in HR work with. File things where they make sense to you.
- Name employees see is what appears to the person receiving a document from that folder.
Use the second one when your internal name would be wrong to show. A
folder you call Disciplinary is clear to HR and reads as an
accusation to the individual who receives a letter from it — so set
Name employees see to something neutral, such as Personal notices. Leave it empty and employees simply see the folder name.
The label is presentation, never evidence: changing it changes what everyone sees from that moment on, including for documents sent long ago. It never changes what somebody accepted.
To set or change it, press the rename control on the folder’s row, fill Name employees see, and press Save folder. When a folder has one, the tree shows it beside the internal name, so you can always see what the other side reads.
Add a document and publish a file to it
- Select the folder the document belongs in.
- Under New document, type its title and press Create document.
The document now exists with No file yet. That is a real state, not an error — the document is a place for content, and the content arrives next.
- On the document, under File, pick the file from your computer. (The button beside it is your browser’s own file picker, so its wording comes from the browser, not from Pauzora.)
- Press Publish version.
Pauzora inspects the file itself to decide what it is; the name you gave it and its extension are not consulted. If a file is refused, the screen shows the reason it was refused — for example a format that is not accepted, or a file over the size limit.
Publish a newer version
Publishing again adds a version; earlier versions are kept and never overwritten. From the second version onward you must answer People who already accepted:
- Keep their acceptance — a correction that does not change what people agreed to. Nobody is asked again.
- Must accept again — the content changed enough that the earlier agreement no longer covers it. Everyone must accept the new version.
Choose deliberately: this decides whether the acceptances you already hold still mean anything for this document.
What the checking status tells you
Every published file is scanned before anyone can open it. The document shows one of four things, and they call for different actions:
- Still checking this file… — the scan has not finished. Nothing to do but wait.
- Checked — ready to share — the file is clean and can be opened.
- Blocked — this file is infected — the scan found something. The file will never be served to anyone. Publish a clean version.
- Couldn’t be checked — nobody can open it yet — the scanner could not give an answer. This is not the same as clean and it is not an accusation about your file: try publishing it again, and contact support if it persists.
Employees are never shown this distinction — to them, a file that is not confirmed clean is simply not available yet.
What happens next
Creating a document does not send it to anybody. Deciding who receives it, and what they must do about it, is a separate step.