Assigning a document and choosing what people must do
Dieser Inhalt ist noch nicht in deiner Sprache verfügbar.
Put a document in front of the people who need it, say what you need from them, and see who has done it.
Before you start
- You need a role that manages documents (HR or Admin).
- You work with the people your role covers. If your HR or Admin role is for one branch or one team, you can send documents only to people in that branch or team, and the roster, their replies and their withdrawals are the same way. The list of people you can pick from may still show everyone in the organization. If you choose someone outside your role and press Assign, nothing is sent, and the message This person is outside the part of the organization your role covers, so you cannot send them documents. appears above the Assign button. Trying again gives the same answer — ask someone whose role covers them.
- The document needs a file published to it. You can assign a document with no file, but there is nothing for anyone to read yet.
- Open Documents from the main navigation, then select the folder the document is in. On a phone the navigation is in the More drawer.
- The screen has two tabs. Library is the one described here; Sent to me is your own documents, which everyone has — see Reading and accepting a document sent to you.
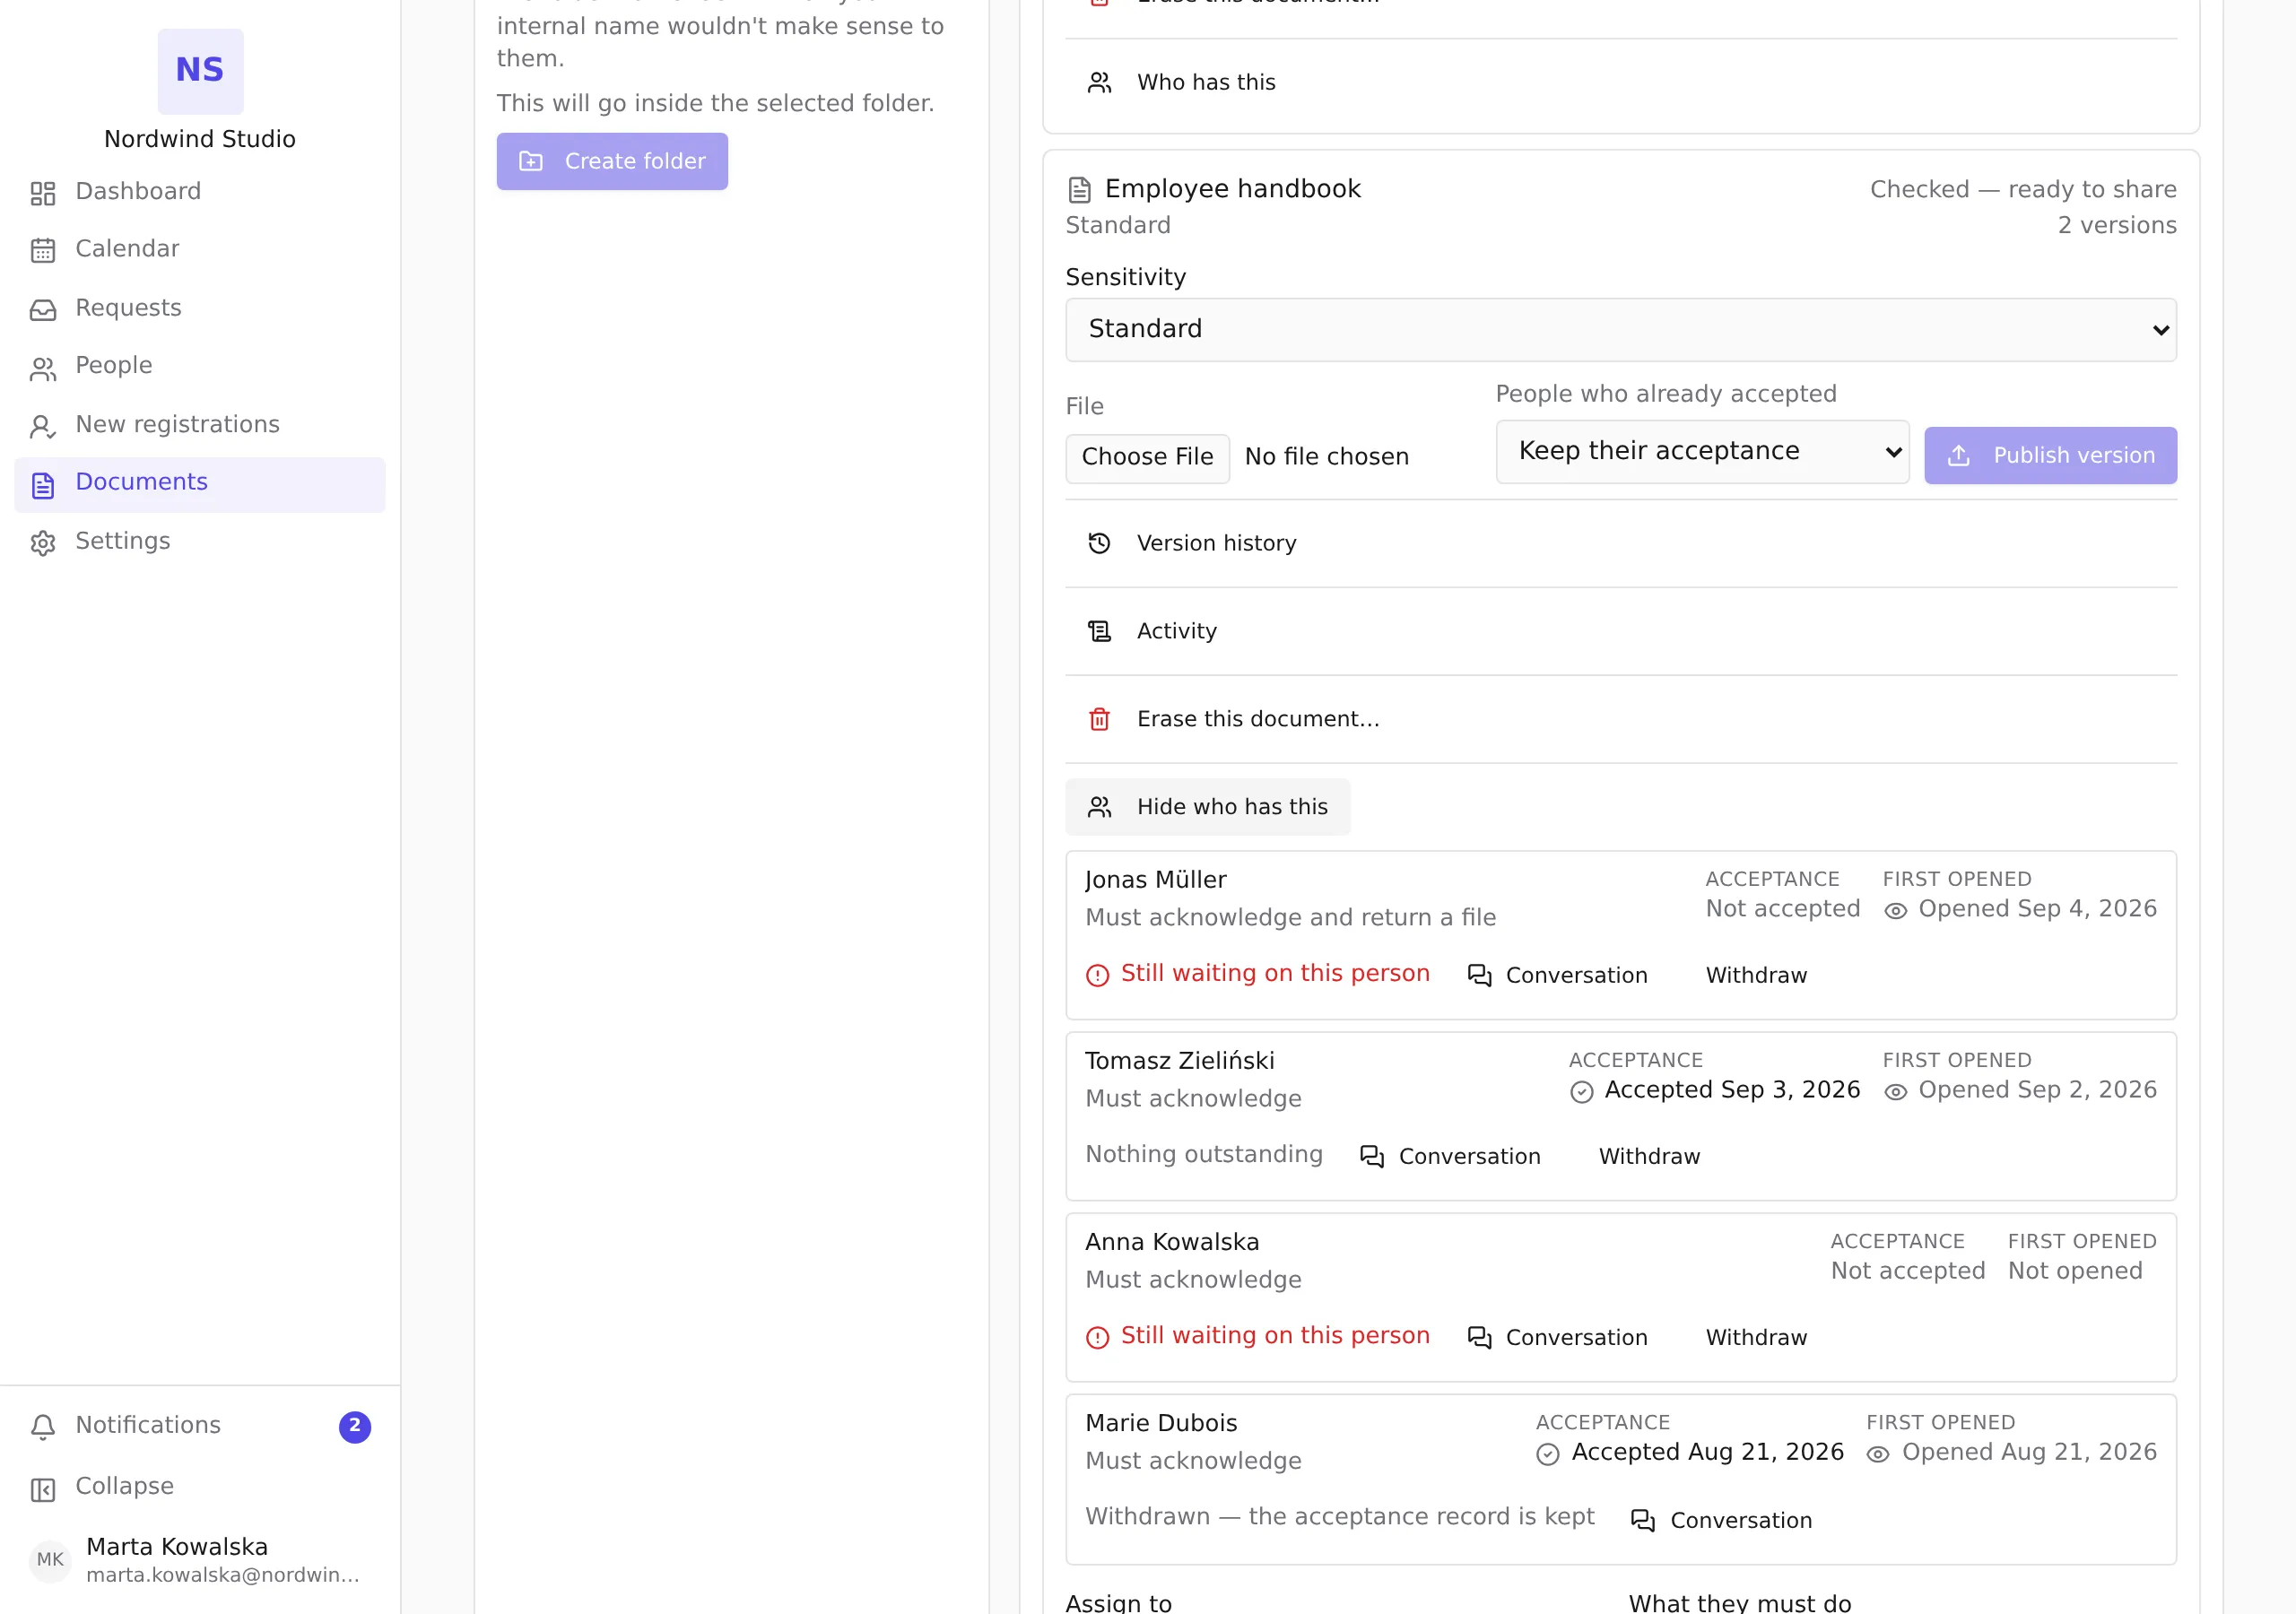
Assign a document to someone
- Find the document and press Who has this.
- Under Assign to, choose the person.
- Under What they must do, choose one of the three options below.
- Press Assign.
Someone who already has this document is not offered in the list — a person holds one assignment per document, and to change what you ask of them you withdraw the assignment and make a new one.
The three things you can ask for
No action needed — the document is simply available to them. Use it for handbooks, policies and reference material you want people to be able to find, where you do not need to record that anyone read it.
Must acknowledge — the person is asked to confirm they have read the document and accept its contents. This is a statement of will, not a read receipt: it records that they said so, against the exact version they were shown.
Must acknowledge and return a file — as above, and the person is also expected to send something back, such as a signed copy. Employees send it as a reply on the document, with the file attached — see Replying to HR about a document sent to you. A reply does not accept the document for them; they accept it as well. You read their reply, and answer it, in the conversation on their row — see Following up with people who have not accepted a document.
What the roster tells you
Each person’s row carries two separate pieces of evidence, in two separate columns, and the difference between them matters:
- Acceptance — whether they have accepted, and when. This is the strong evidence: the person acted deliberately.
- First opened — whether they have opened the document at all, and when. This is weak evidence. It says the file was opened and nothing more.
They are kept apart on purpose. “Opened and did not accept” and “never opened” are different situations that call for different follow-up, and an opening is never a substitute for an acceptance.
Below those, the row says whether anything is still owed:
- Still waiting on this person — they have not done what was asked of them for the document’s current version.
- Nothing outstanding — they have.
Publishing a new version can put someone back into still waiting, if you set People who already accepted to Must accept again when you published it.
Withdraw an assignment
Press Withdraw on the person’s row.
Withdrawing takes the document away from that person. It does not erase what already happened: if they had accepted, the row still shows the acceptance and reads Withdrawn — the acceptance record is kept. The person also keeps access to their own record of what they accepted.
Change how sensitive a document is
Each document has a sensitivity level, and the level decides who can reach it.
- Find the document.
- Under Sensitivity, choose Standard, Restricted or Confidential.
The change takes effect immediately. The person a document is assigned to can always reach it, whatever its level — otherwise a confidential document could not be sent to the person it is about.
If you cannot reach a document yourself, you will not see it here to re-classify. Raising a level can take a document out of your own view.
Decide who can see each level
The panel at the bottom of the screen, Who can see which documents, maps each sensitivity level to the lowest role that may open a document at that level.
- Under Level, choose the level.
- Under Needs at least, choose the role.
- Press Save mapping.
Levels you have not mapped fall back to the product defaults: standard and restricted need HR, confidential needs an Admin. Remove takes a level back to that default.
The levels have to stay in order. A more sensitive level cannot be easier to reach than a less sensitive one — you cannot let every employee open confidential documents while restricted ones need HR. If you try, the panel tells you so and nothing is saved; change the less sensitive levels first.
This panel needs a role that manages organization settings. If you do not see it, you can still assign documents and set their levels — what each level means is configured elsewhere in your organization.
What people see
An employee sees only the documents assigned to them, and only the folders those documents are in. They never see this roster, and they never see who else has the same document.